Git, GitHub & the HPC
Git & GitHub
- This is a nice tutorial / game to get acquainted with all the Git & GitHub commands (look inside the releases tab to download it)
- This is a video tutorial explaining how to use Git & GitHub inside the VSCode IDE (useful when working on the repository on your local device)
What is Git
Open source & free source control management (= SCM)
⇒ version control for program code
- archive of all previous versions & changes of your code
- all changes are linked to the author of the code
- everything is encrypted
- many people can work on the same code
Git
This is the actual version control system
You can use it locally in the CLI (command line interface), a GUI, or right inside your IDE
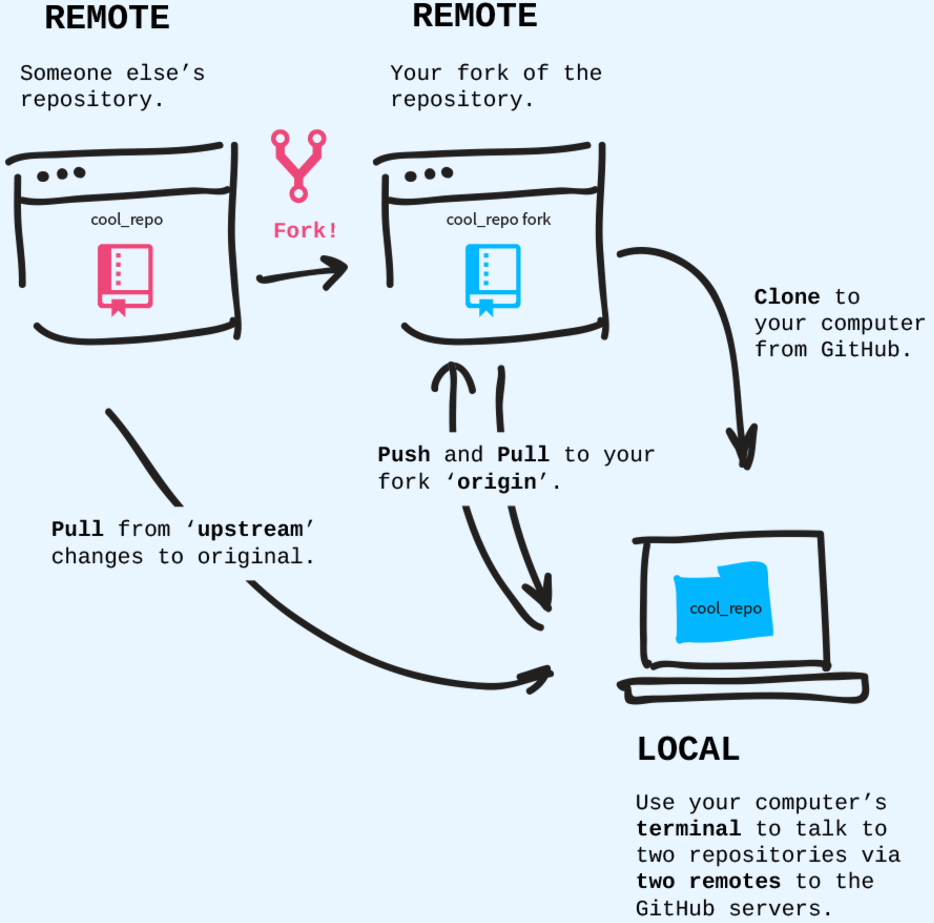
GitHub
This is the server/website used to store your code, track issues, develop code in groups, …
Uses markdown (.md) files to provide information about repositories
e.g. the README.md files but also the wiki pages

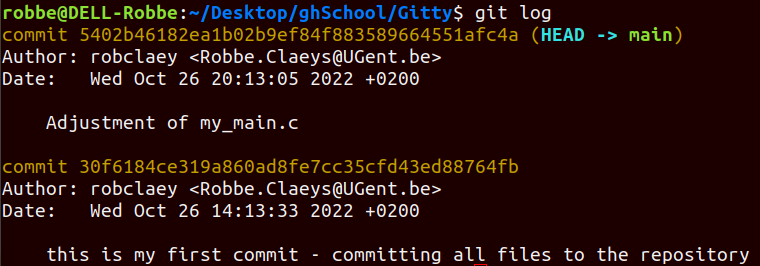
Git history: commits
The history forms a chain of snapshots (commits) of your code.
Every commit contains a hash function that links it to the chain cryptographically securing the whole history
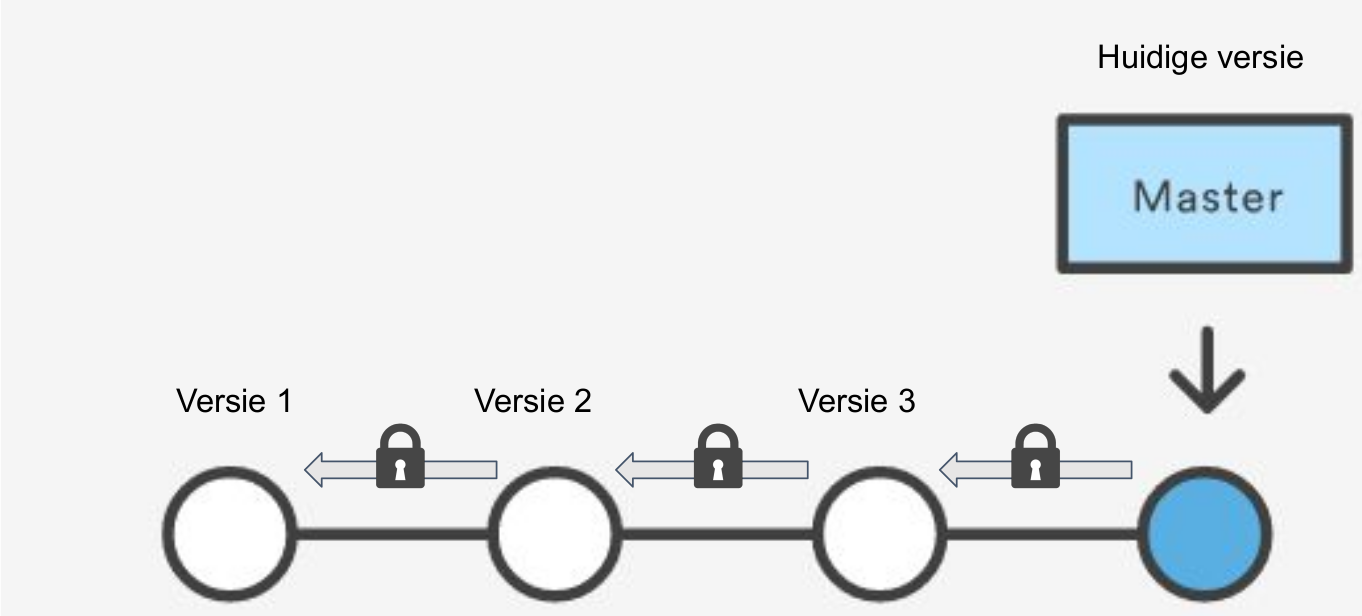
With the git log (--oneline or -p) command you can actually view all these changes through time - with the hash function, messages, and the author (regular, short, or long version)
(here 2 commits were performed)
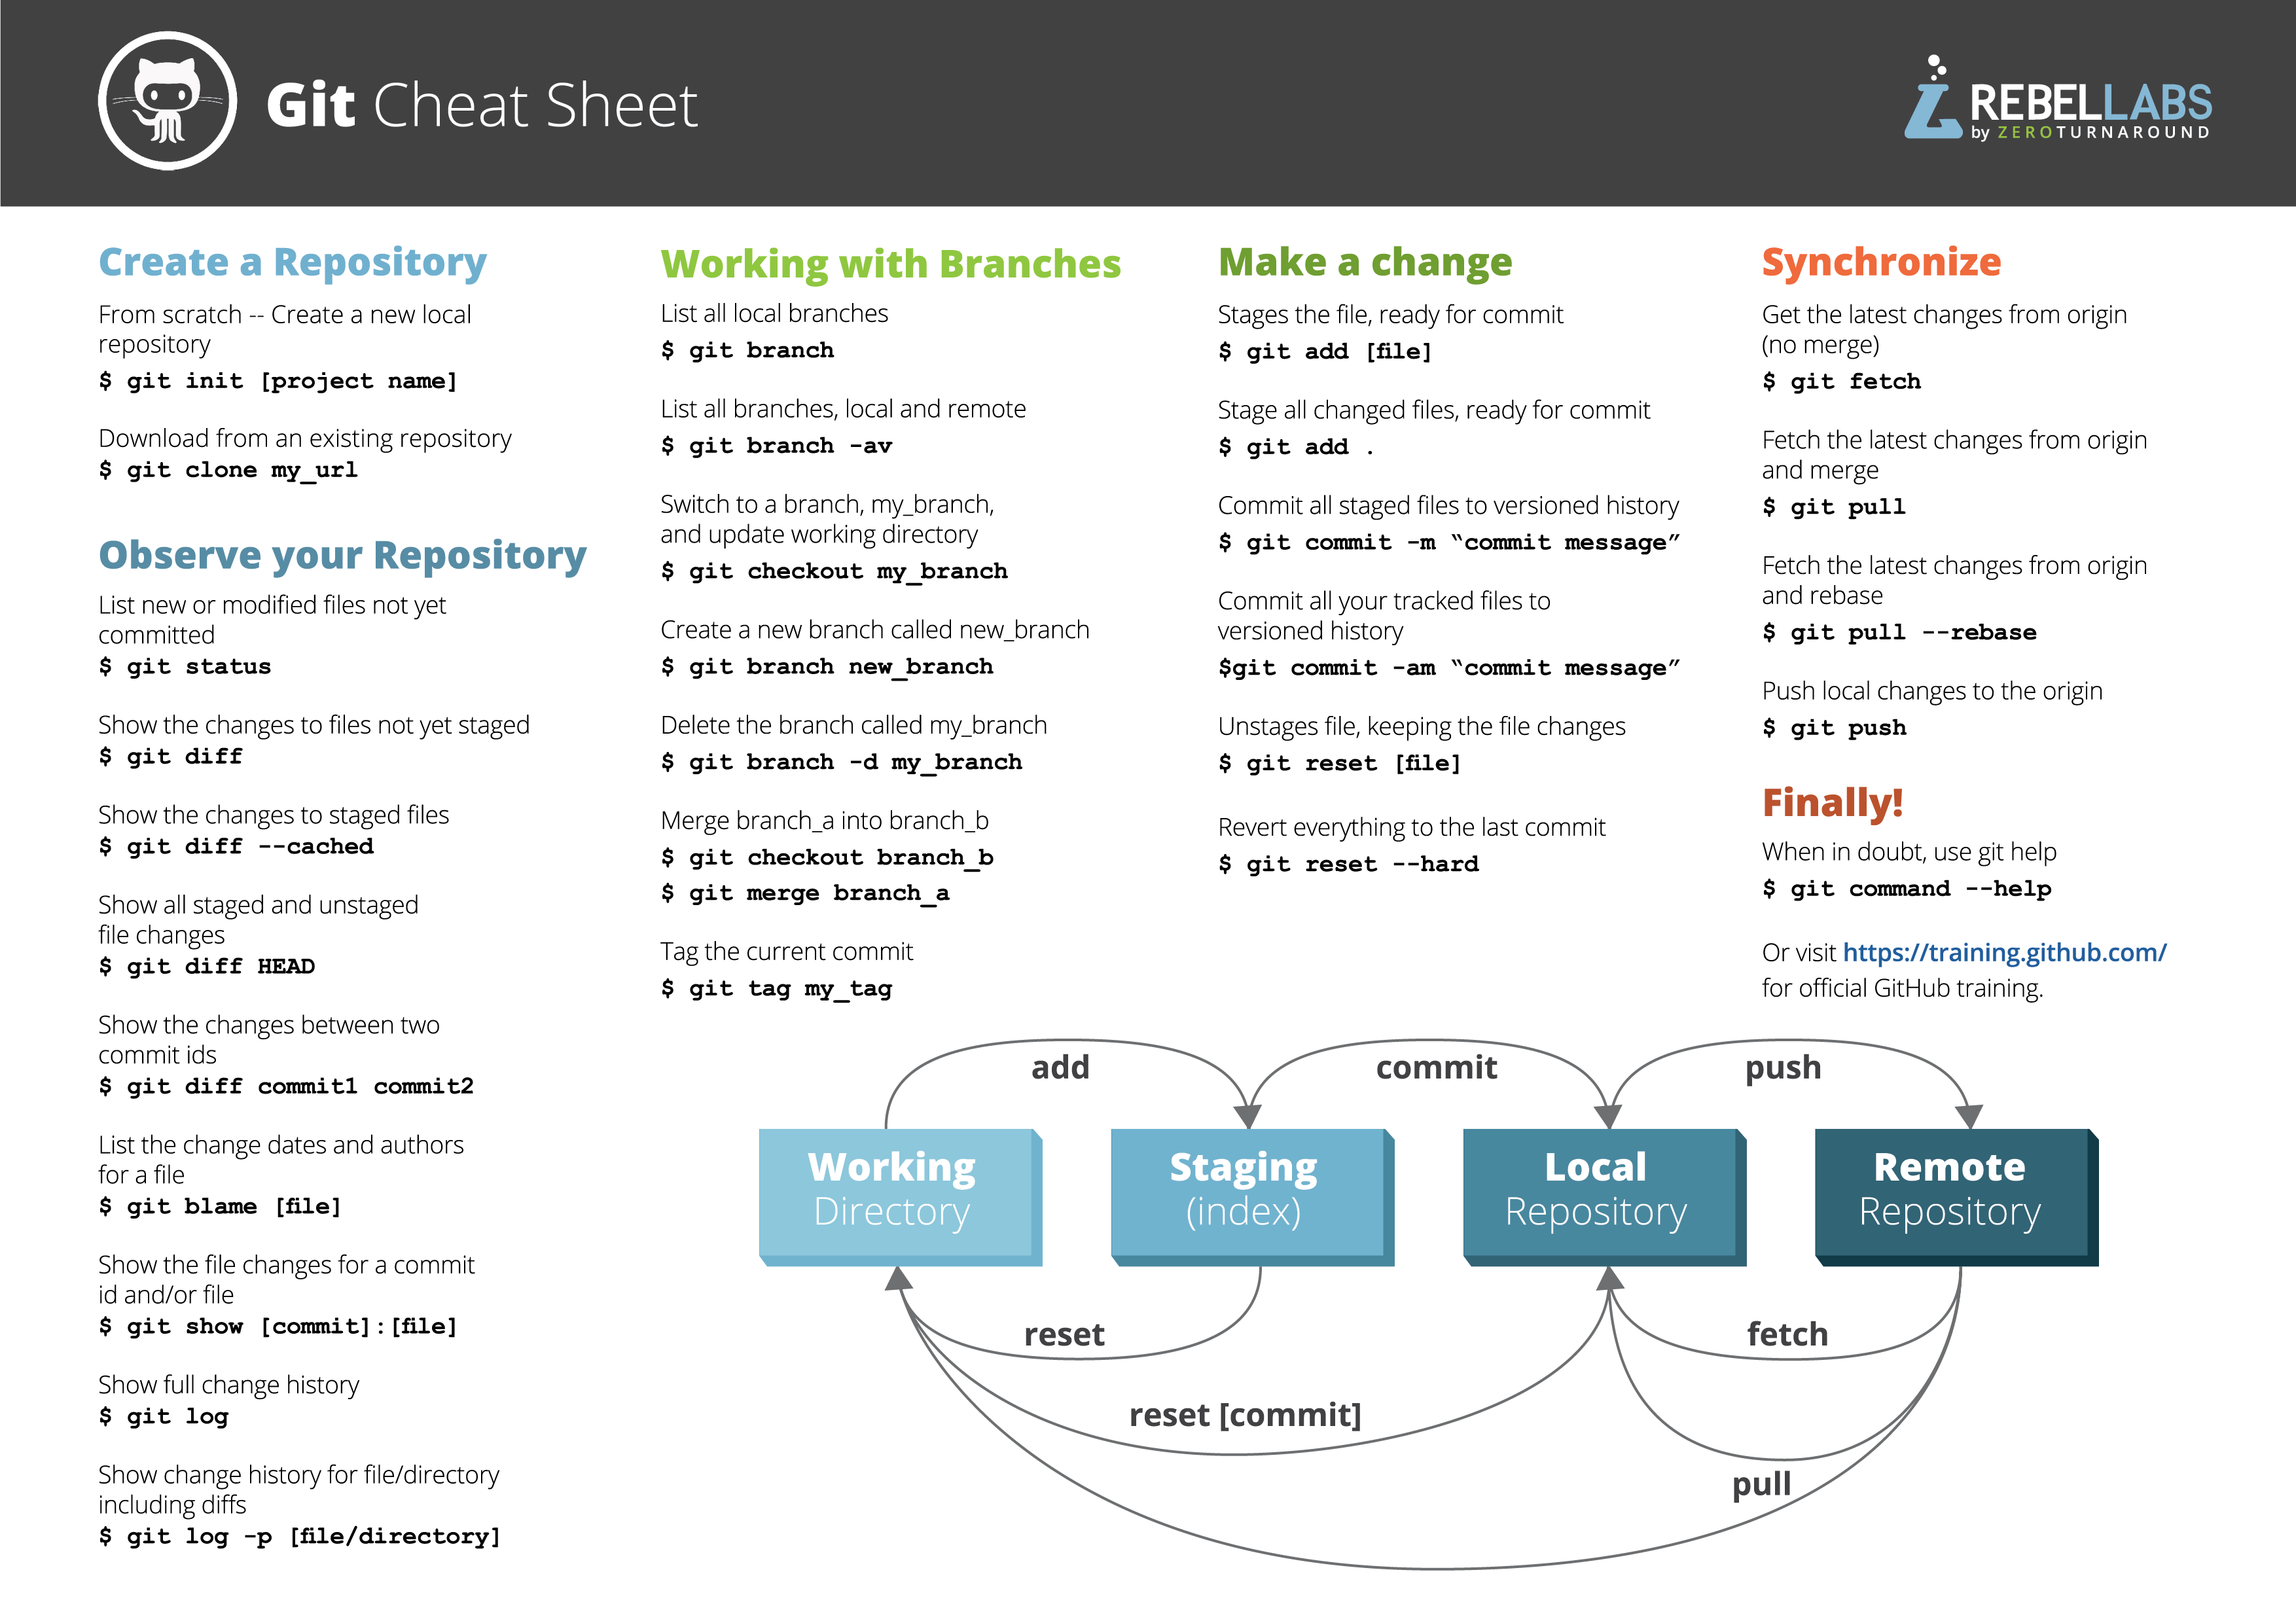
Git workflow
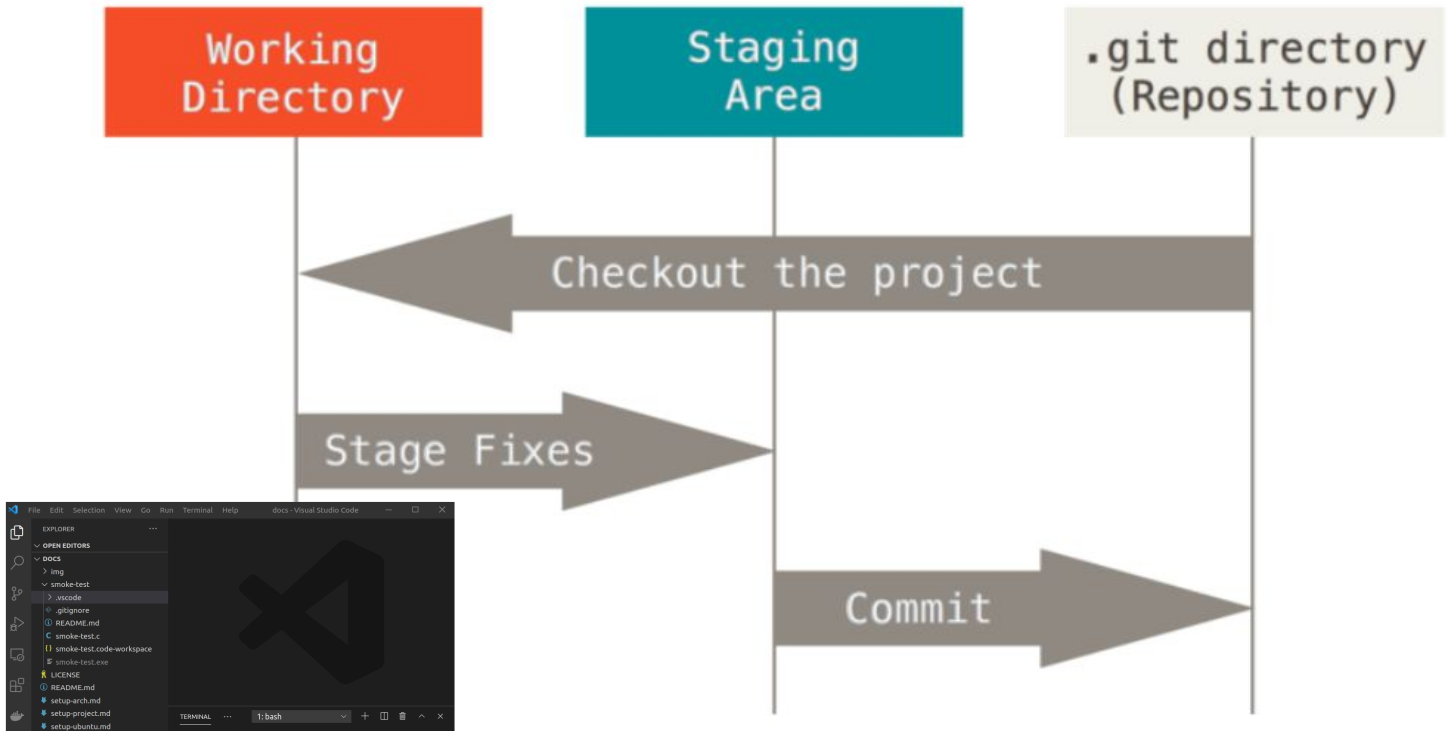
Create, commit and push new files
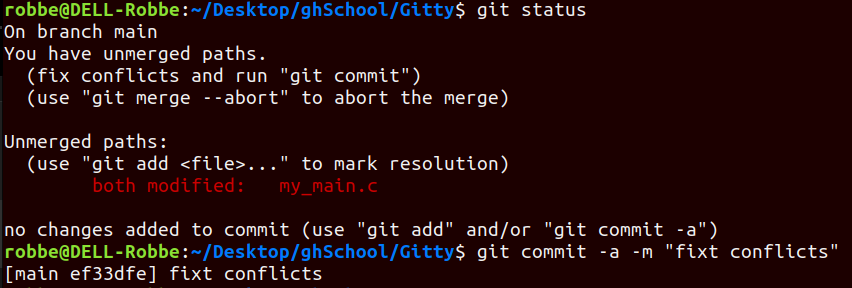
You can always view the state of your file with the git status command
- Create or alter a file locally
Use git init to initiate git inside your current working directory
💡Modified state= when some changes have been made to a file, which are not yet saved
⇒ the state of file has been altered from its previous state in the committed state
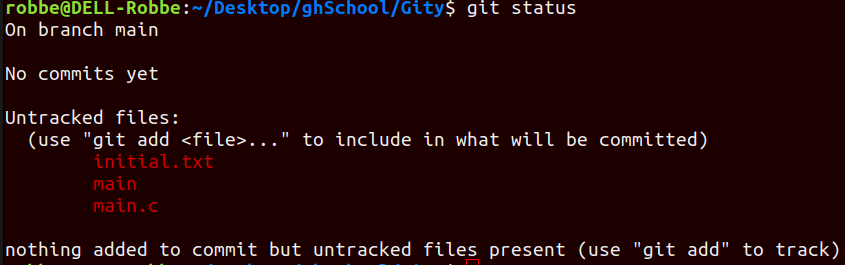
Right now, none of the files in our directory are being ‘tracked’
git add <file>to add the file to the staging area (or useadd .oradd --alloradd -Ato add all the files in the working directory)💡Staged state= a file that is ready to be committed, all necessary changes have been made
⇒ this command doesn’t return anything but you can always view the status of your files with the
git statuscommand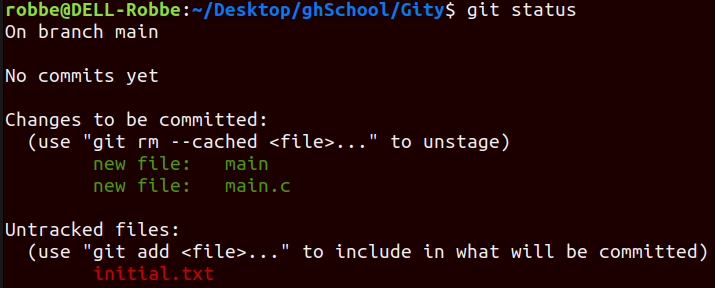
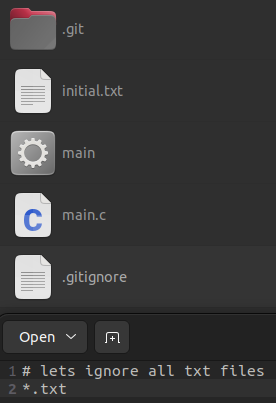
Optionally: make git ignore certain files in the directory (e.g. sensitive data)
→ create .gitignore file
→ specify which or what type of files you wish to ignore
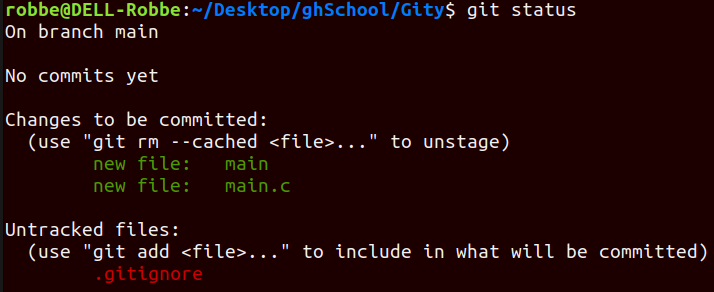
*.txt will make sure are .txt files are ignored
Now .txt files no longer show up when you ask for the git status
git committo take a snapshot (commit) of all the files in the staging area and add the commit to the local repository⇒ these files are now officially part of the git record
If you commit, you have created a ‘version’ of your code that can be altered from that point, compared against, or jumped to at any time
- You can add a message to this commit with the argument -m followed by a string with your message
- You can also use
git commit -a -m "your message"to skip the staging step and go straight to committing your file
💡Committed state= a file is committed when all the changes made to the file have been saved in the local repo
⇒ ready to be pushed to the remote repo (on GitHub)

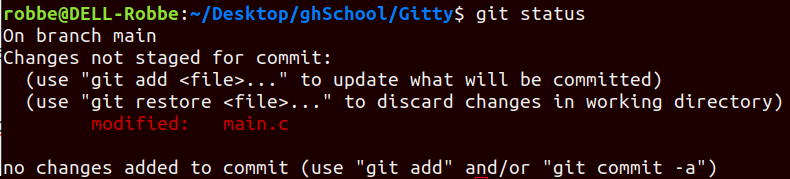
When you make changes to your committed repository, git will recognize that some of your files have been modified
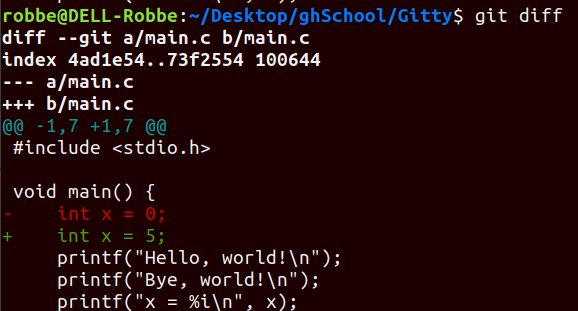
git diff lets you view what changes have been made
Now you can once again add to stage & commit to repository or …
restore --staged <file>to clear staged files
restore <file>to go back to previous a previous commit (this even works for deleted files)
reset <hash tag>to restore to an older commit (view hash withlog --oneline)
- Push the repository to GitHub
git remote add origin <link>→ creates a connection between your local repo and the remote repo on GitHub (the connection is called origin)git branch -M main→ changes your target branch’s name to ‘main’git push -u origin main→ pushes your repository from your local device to GitHubgit push--allto push through all your branches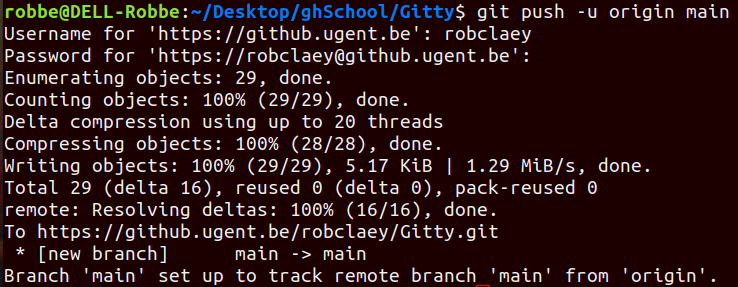
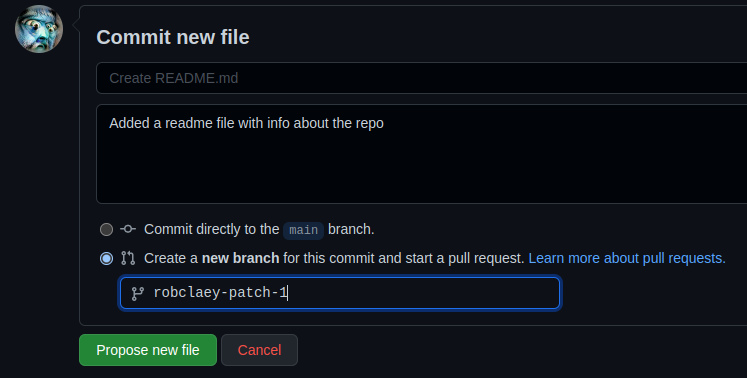
Inside GitHub, you can add and edit files…
Making changes to your repository on GitHub
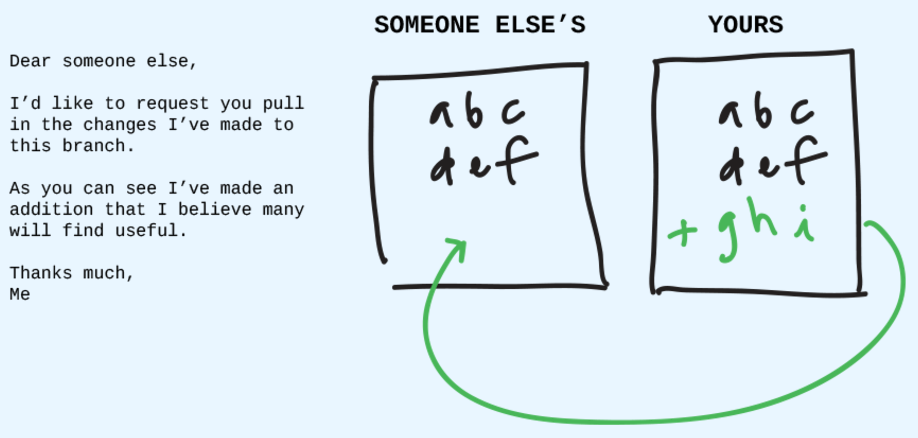
When making changes, you can choose to create a new branch and start a pull request
⇒ request to merge this to the main branch
From here you can discuss the pull request, link it to certain issues or milestones, …
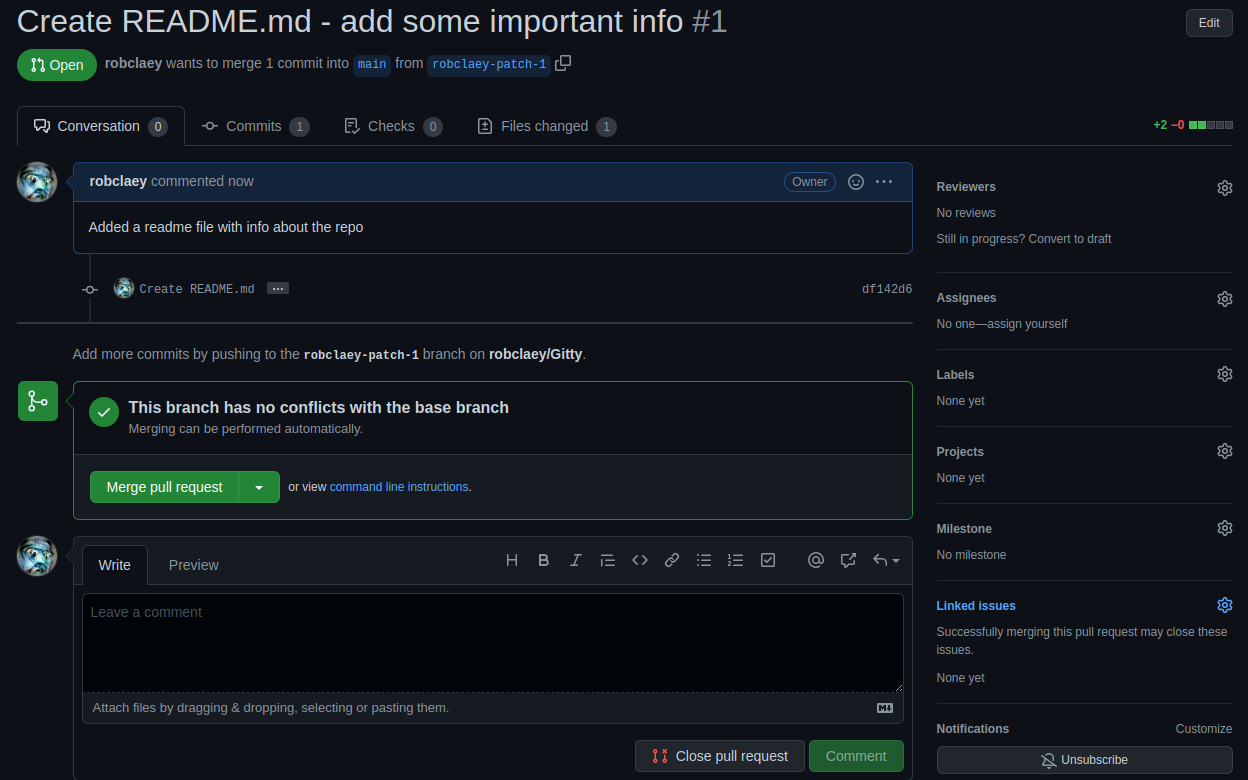
If all is well & there are no conflicts, you can merge the request to the main branch and close all corresponding issues
There are many more repository options including wiki, insights, and release
Pull from GitHub
For this you have two options:
git fetch
→ download all the history from the remote tracking branches
git merge
→ merge this fetch with your local branch
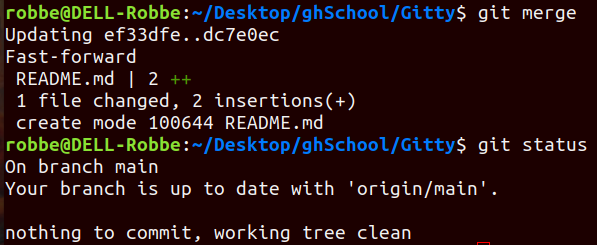
git pull combines both of these commands
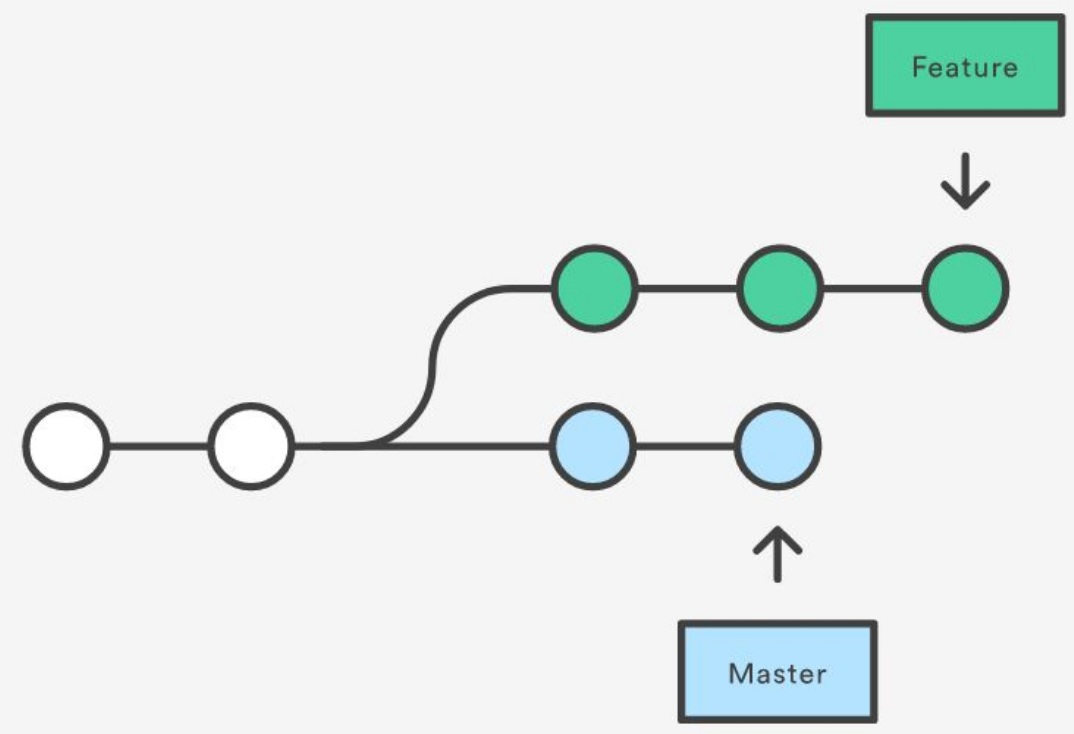
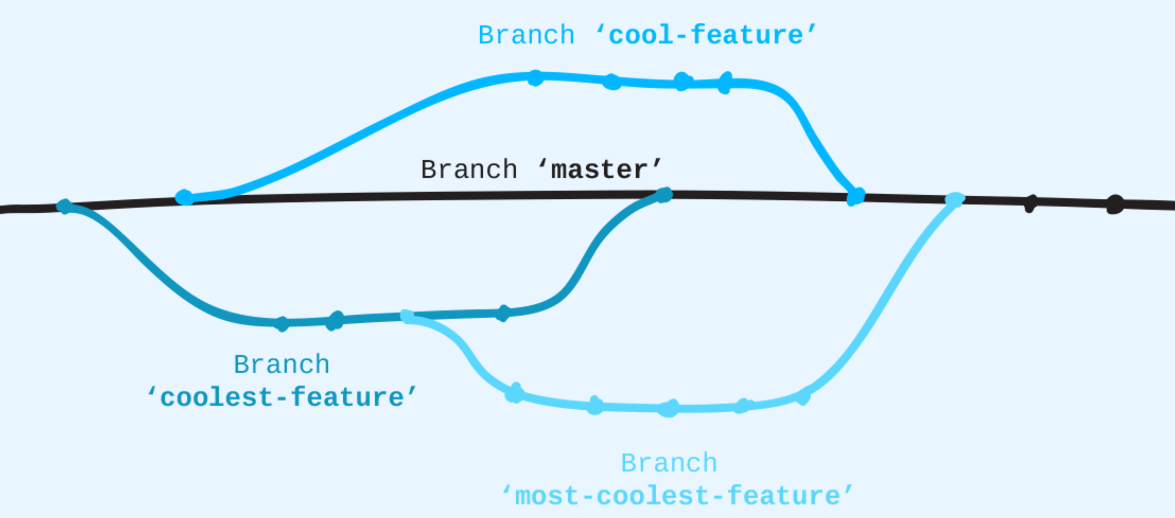
Branches
These allow you to
- develop older versions of your code
- develop new features off of the main branch (live version)
⇒ stable vs. dev branches
- you can merge branches or add features from one branch to another
Use git branch branchName to create a new branch to which you can make changes
git branch→ view all the branches
git switch branchName→ switch to another branch
You can modify, stage and commit files to this current branch
Whatever you see in your file explorer reflects the current states of the active branch
💡Or usegit switch -c branchNameto create and switch to a branch in one commandOr use
git checkout -b branchNameto do the same thing
git merge -m "message" branchName→ merge multiple branches
git branch -d branchName→ remove branch
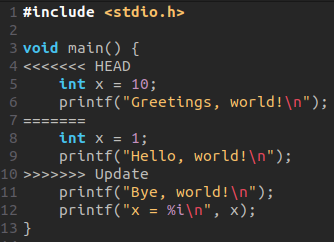
Merging conflicts
This branch merger went quite smooth, nothing was changed in main so there were no conflicts…

When this happens, you get into a merger branch
Git will actually show you, inside your files, where and what the conflict it
→ HEAD indicates what is in main
→ fix conflicts and commit
UGent High-performance Computer (HPC)
https://hpcugent.github.io/vsc_user_docs/pdf/intro-HPC-linux-gent.pdf
Connecting
To submit jobs to the HPC you need a ssh (secure shell) connection
⇒ ssh vsc45450@login.hpc.ugent.be
→You will be prompted to provide login details
→Automatically redirected to your personal folder
Uploading
Open FileZilla and create an SFTP connection
→Again, you will be prompted to provide login details
→Once connection is established, simply drag and drop files
Submitting jobs
You can create job-files in the .pbs format
- Submit your jobs with
qsub
- View the status of your job with
qstat⇒ Queued, Running, Completed, Failes
The HPC will return a job_id at the start of the run and output an error-file file_name.pbs.e.job_id which provides you with info
.pbs files
These always start with a shebang line
⇒ indicates which interpreter should be used (e.g. bash)
The following lines provide information to the server for your job
- nodes: how many nodes to use (default = 1)
- ppn: processors per node (i.e. CPU cores)
- walltime: the maximal runtime of your script
- mem: memory per code (limited depending on which cluster you use)
#!/usr/bin/env bash

#PBS -l nodes=1:ppn=1
#PBS -l walltime=00:30:00
#PBS -l mem=2gb

echo "hello world!" # prints string
cat Test.txt	      # concatenate: prints file(s) content